Chef is a systems and cloud infrastructure automation framework that makes it easy to deploy servers and applications in amazon cloud infrastructure. Chef deployment usually consists of one (or more) nodes (ex: Web/App ec2 instances) and Chef EC2 instance. Cookbooks (and recipes) are written to tell Chef how each node in your architecture should be configured. The chef-client (which is installed on every node) does the actual configuration.
In this post, we are going to explore how to install and configure chef server 11.0.8 on a RHEL 6.3 EC2 instance.
The base article is originally written by sanket @ http://sanketdangi.com/post/50649257357/chef-11-configuration-aws-ec2-rhel-6-3-instance
Before moving forward, we need to understand that there are two ways to manage our infrastructure i.e., using a chef-server for all purposes or splitting work between chef-server and workstations. A workstation is a computer that is configured to run knife, to synchronize with the chef repository, and interact with a single chef server. The workstation is location, from which most users of chef will do most of their work, including:
· Developing cookbooks and recipes
· Keeping the chef repository synchronized with version source control
· Using knife to upload items from the chef repository to the chef server
· Interacting with nodes, as (or when) required, such as performing a bootstrap operation.
Environment Details
Operating System : RHEL 6.3
Instance Type :m1.small
AMI ID : ami-cc5af9a5
Chef Server Version :11.0.8
Region & AZ :US-East-1A
Security Group Ports :22,443
Environment Description :
Latest version of Chef is used in this exercise. Amazon EC2 US-East region is used in this deployment with chef server launched on a m1.small EC2 instance. For production deployments, you can right size your chef EC2 instance type depending upon following factors :
- The number of nodes that you are managing through Chef . Please also consider number of instance launched thru Amazon Auto Scaling.
- Frequency of updates done through Chef
- Size of your updates(MB) done through Chef
Generally a single m1.large Chef is enough for 100+ nodes, but if you feel your chef server is overloaded you can scale up to a higher EC2 instance + use EBS Optimized+ PIOPS for better performance in AWS. CycleComputing has used a single CC2 EC2 instance of Chef for handling up to 10600 instances in AWS. Refer the entire story here :
Installation and Configuration Steps
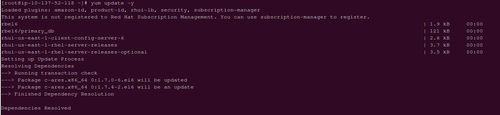
Step 1: Before installing chef-server, it is advisable to update your repositories
# yum update –y

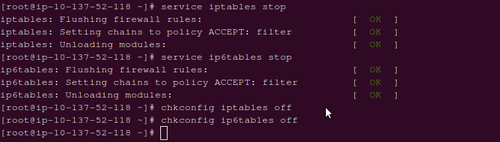
Step 2: By default, iptables rules are operational in RHEL instances. We need to make sure that they are stopped.
# service iptables stop
# service ip6tables stop
# chkconfig iptables off
# chkconfig ip6tables off
Step 3: Download chef-server rpm from opscode website. In order to get download link, navigate to http://www.opscode.com/chef/install/ and select Chef Server tab. Select necessary operating system(Enterprise Linux), version(6) and architecture(x86_64). Select the version of Chef Server 11.x to download, and then click the link that appears to download the package.
In order to download package on ec2 instance, copy link location and download using wget
# wget https://opscode-omnibus-packages.s3.amazonaws.com/el/6/x86_64/chef-server-11.0.8-1.el6.x86_64.rpm

Step 4: Install chef-server rpm package
# rpm –ivh chef-server-11.0.8-1.el6.x86_64.rpm

Step 5: Execute chef-server-ctl command to configure chef-server.
The
chef-server-ctl reconfigure command reads the /etc/chef-server/chef-server.rb file and applies the specified configuration to the system. Any time you make a change to your configuration, you need to run chef-server-ctl reconfigure to apply it. This command will set up all of the required components, including Erchef, RabbitMQ, PostgreSQL, and all of the cookbooks that are used by chef-solo to maintain Chef Server 11.x.
# chef-server-ctl reconfigure

Chef-server installation can be verified by using “chef-server-ctl test” command. This will run the chef-pedant test suite against the installed Chef Server 11.x and will report back that everything is working and installed correctly.
To have a look at chef processes, check process list using command “ps -ef”.
Step 6: Move chef-validator.pem and chef-webui.pem keys to .chef directory
# mkdir –p ~/.chef
# cp /etc/chef-server/chef-validator.pem .chef/
# cp /etc/chef-server/chef-webui.pem .chef/
# chown –R $USER .chef/

Step 7: Install knife gem
Knife is the Chef command line management interface that allows users to interact with the Chef server API, local Chef Repository interface and other Chef nodes. To install knife, we need to add a repository for installing ruby and ruby gems.
# rpm -Uvh http://rbel.frameos.org/rbel6

# yum update –y
# yum install ruby ruby-devel ruby-ri ruby-rdoc rubygem-chef gcc gcc-c++ automake autoconf make curl dmidecode

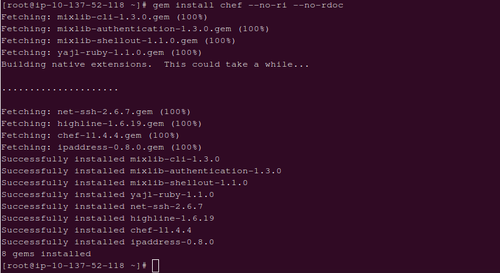
# gem install chef —no-ri —no-rdoc
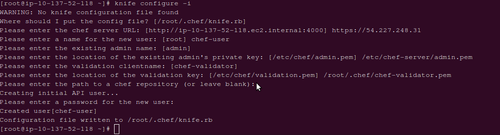
Step 8 : Configure knife so that it can interact with chef server
# knife configure -i
For configuring knife, we need to pass few details :
Path for knife.rb file : Default is /root/.chef/knife.rb
Chef Server URL : https://<Elastic-IP> or https://<EC2-Public-DNS>
Name of the new user : <any-desired-name>
Name of the existing admin : admin
Location of admin’s private key : /etc/chef-server/admin.pem
Validation Key Name : chef-validator
Validation Key Path : /root/.chef/chef-validator.pem
Path of chef repository : <default>
New User Password : <any-desired-password>
Now, we have our Chef Server up and running. We can also have a look at our chef server by navigating web-console url and providing admin or newly created user credentials. The default admin credentials are mentioned on login page.
URL : https://<Elastic-IP> or https://<EC2-Public-DNS>
No comments:
Post a Comment